Thursday, 14 July 2016

Turkey Part 1: From Muscat to Istanbul


Those of you who follow me on Instagram (@sidraamjed) know that I went to Istanbul with my sister-in-law ('N') 2 months back. This being our first trip to Turkey, we did all the touristy things, went to all the touristy places but we tried the food that the locals eat, which was incredible by the way (will get to that in the next post)
This trip was amazing in so many ways, first and foremost, it was just me and my sister-in-law, so just a girls' trip. Secondly, leaving behind the blistering heat of Muscat, the gorgeous weather of Istanbul was a welcome change, temperature ranged from 16°C to 22°C throughout our stay. The overall cost of the trip was really cheap as well (Thank you FlyDubai!)

So, for the next posts I will write as much as I can about our trip to the city of two continents!

The whole idea of this trip started in February, when J was just going through his facebook and saw deals from Flydubai. Husband couldn't go because of work. 'N' had some work related thing in Istanbul as well, so this deal came just in time. We booked our flight the very next day.
The cost of per ticket was 89 OMR (24,208 pkr), which was really cheap as compared to the normal fare for Istanbul which range in between 170 to 220 OMR (depending on the airline)

DAY 1

So on 3nd May 2016 we packed our bags and got ready to experience Istanbul!
Our flight was due to depart from Muscat International Airport(MCT) at 12:35 pm and set to arrive at Sabiha Gokcen International Airport at 20:25 pm, with a 3 hour transit at Dubai International Airport(DXB)

Beautiful Oman
In Front of Me
You can see the Burj Khalifa in this picture. Okay, just barely.

3 hour transit time wasn't that bad either, which we spent roaming around the dutyfree shops.
We had lunch (KFC, another very 'healthy' choice)at the Dubai airport. One drawback to travelling with Flydubai is that they dont serve complimentary meals during their flight, which i was quite disappointing with, You can buy the meals in-flight though. I'm always looking forward to meals in a flight, like a kid, seriously!
But we took this in stride considering we were travelling on pennies!
We did have food before we boarded so we were pretty full, and we had a stash of chips too!

The overall experience of travelling with flydubai was above average. The seats were okay, leg space was a little tight, but the seat next to us was empty, so it compensated for that. The staff was just okay thought, my sister-in-law had to literally wait an hour for a bottle of water!

We landed at Sabiha Gokcen Airport at 8:25 pm. After getting our baggage, the first thing we did was get credit for the sim (cousin's sim). The service provider was Turkcell and the package we opted for was 1 GB internet and 30 minutes of international calls for 40 TL (5.300 OMR / 1450 PKR). This took us about an hour.

Enroute Istanbul

Before landing
Sabiha Gokcen International Airport

The hotel we chose was near Taksim Square and the best way to travel from the airport was through Havatas bus service. The bus departs every 30 minutes from right outsie both the airports (Sabiha Gokcen and Attaturk) to designated stops to many parts of the city. You can travel to your hotel by taxi or through a shuttle service that you can book in advance, but they are both pretty expensive.If you're travelling on a budget, like us, than Havatas is the way to go. 

The ticket from the airport to Taksim was 14 TL per person (1.800 OMR/ 508 PKR), which is pretty cheap as compared to the taxis, they charge around 80-100 TL

We did a lot of research on this, and booked our hotel near the Havatas Taksim Square stop.


It was raining when we landed, sight for sore eyes!
The bus took about 1 hour and 15 minutes to reach Taksim Square,. Out hotel was a 5 minute walk away (Thank God for trolley bags!). It did get pretty cold walking in the rain, \but we cme prepared with jackets and umbrellas (which by the way we didn't have the time to open). arrived at the hotel soaking wet! 

Dinner that day was just Pringles and water as it was late, and we were soooooooo tired (the 'o's in my so, making you realize how tired I was. This does not make sense. But please get it?)

So this was the first day!
We were excited for the adventure to begin, tummies full of junk food, reached our hotel in one piece, a good day all in all!

Next post would be our Day 2 in Istanbul, our walk from Istiklal street to the Galata Bridge!
See ya! 


Thursday, 9 June 2016

Russian Salad


Ramadan Mubarak folks!
This is a blessed month in which Muslims all over the world fast from dawn till dusk. We practice self-discipline, increase Prayers, Recite Quran and charity during this Holy month.
This Holy month also teaches us self-control, sacrifice and empathy for those who are less fortunate.
So people, try not to waste food, and try to give to the poor as much as you can, not only for this month but all year round!

 Food is a huge part of Ramadan, from delicious salans and parathe in Sehri to pakore and fruit chaat in Iftar. It does get a bit old after a few days though, all the fried stuff (the food coma after all that, i could just pass out right in front of the table!), we ,meaning me and my husband opt for a more easier and much lighter-on-the-stomach option, We just have dinner !
We break our fast with Khujoor (dates), offer Maghrib prayer and than have dinner. Much better, believe me!
It was just the 3rd roza, but im already tired of frying stuff, so today I made Grilled Chicken with Potato mash and Steamed Vegetables. Paired it with this gorgeous Russian salad. 
(Will post the recipe for the grilled chicken as well)
This recipe if so close to the one you get at Pizza Hut, really delicious and so easy to make as well.

The recipe is slightly adapted from Tarla Dalal.

Serving: 3-4 people
Prep Time : 5-10 minutes
Cooking Time: 15 minutes

You'll need,
1 Potato, peeled and cut in small cubes
1 small Carrot, peeled and cut in cubes
1/4 cup of Peas
1 Apple, diced (I like them skin-on, you can peel them if you like)
1 small Cucumber
1/4 cup of Mayonnaise
2 tbsp of Cream (or full fat milk)
Salt to taste
a pinch of Black Pepper
1 tbsp of Caster sugar

Additional ingredients you can add,
Pineapple Chunks
Sweet Corn
Chickpeas
Bean sprouts
Tomatoes


Add the diced potatoes to the boiling water. After 5 minutes, add carrot and peas as well. Cook for about 5-7 minutes. Check the potatoes with a fork to see if they are done. Drain and leave to cool.

Meanwhile, mix together mayonnaise, cream/milk, salt, castor sugar and black pepper.
Chuck in boiled vegetables, apple and cucumber. Thoroughly mix, check and adjust seasoning. 


Enjoy!


Wednesday, 25 May 2016

Prawn Karahi


Prawns are somewhat an aquired taste. When done right, they are succulent, juicy and amazing; but a minute overcooked, they are like rubber.
My version of this prawn karahi is so easy, you'll have all the things at your house already, unless you have to go out to buy prawns, for which fresh works best but you can totally use frozen too. No hard and fast rule to any of my recipes (or so I say :D )
Anyway, this recipe is really easy, you dont have to spend hours in the kitchen to make it, 35-45 minutes tops!
It doesnt get any easier than that!
And the taste...
yum!

Prep Time: 15 minutes
Cooking Time: 35-45 minutes
Serving: 3-4 people

Ingredients:
1/2 kg of Prawns (shelled and deveined)
1 large Onion (chopped)
2 Tomatoes (chopped)
3-4 Green Chilies
3-4 cloves of Garlic
1/2 cup of Yogurt
1 tsp Red Chili Powder
1/2 tsp Crushed Chili Flakes
Salt to taste
1/4 tsp Turmeric Powder
1/4 tsp Garam Masala Powder
1/2 a bunch of Coriander 

Fry Onions till light golden brown. Than add chilies and Garlic.
Cook till fragrant.


Add chopped tomatoes along with all the spices. 
Cook covered on medium heat till the oil comes on top and the tomatoes are done, about 15-20 minutes. 
Keep on checking though, so it doesn't burn. If it starts to look very dry add a hint of water.

Now add beaten Yogurt, mix it up and after a minute dunk in all your prawns.
Cook on high for about 3-4 minutes max. Do not cook for more than that or the prawns will get chewy and rubbery.
Add coriander, Whole green chilies and garam masala on top.
This should go from the stove to the table right away. Dont cook the whole dish beforehand and reheat later, this would result in rubbery prawns.
 If you want to save up on time, make the gravy beforehand and when you're ready to serve just heat up the gravy and than add yogurt and prawns. Cook for 3 minutes and serve!

Enjoy!!

And I leave you with this visual.

Until next time!

Sunday, 13 December 2015

Potato Pilaf {Aloo Waley Chawal)


Hey everyone!
I know its been a long time since I've posted anything here. We were busy moving to a different house. the last month and a half has been pretty hectic to say the least!
Between all the shifting, unpacking and organizing; I have started making cakes too. Check them out!!


So back to today's recipe.
Potato Pilaf ; or 'Alo waley Chawal' as we call it; was something that we used to have quite often when we were kids. I remember my mother making this for us and serving this with yogurt or pickles. So good!
But as we got older, this pilaf sort of went on the back burner, we stopped having it as often as we used to.
But this is an ultimate comfort food for me. 
Its really easy and so quick to make too!!

There are a lot of different ways to make it, I'm sure every Pakistani home has their own version, I'm sharing how I make it ! (a little twist to my mother's recipe)

This recipe is for 1 serving only (as I made it for myself only), you can multiply the recipe as per your requirement.

You'll need:
1/2 cup of Basmati Rice
1 Potato peeled and cut in cubes
1 small Onion, chopped
1-2 Green chilies
3-4 Curry Leaves
1/2 tsp of Red Chili Powder
Salt to taste
a pinch of Turmeric
1/4 tsp Cumin (Zeera)
1 small Tomato, chopped

Heat oil in a deep pan, Add onions, green chilies, curry leaves and cumin.
Cook till the onions are golden brown.

Add the spices with a little water to prevent burning. Stir for 10-12 seconds.

Add tomatoes and cook covered on low flame till the oil is released and the tomatoes are tender.

Add potatoes. Cook till the potatoes are half done.

now pour in water (double the amount of rice. I used 1/2 cup of rice, so I added 1 cup of water)

Check and adjust seasoning at this stage.

When the stock comes to a boil add your rice.

Cook on medium heat till almost all the water evaporates and the rice gets puffed up.
Then put on dam at very low flame for 10 minutes.

Take out and serve with Salad and Mint raita!


Thursday, 8 October 2015

Creme Caramel


This is what I had for dessert last night. Pretty gorgeous huh!
Creme Caramel in all its glory!

Some minor imperfections, but I'm pretty happy with how it turned out.

It looks like I spent hours on it, but this took about 15 minutes of prep time only, and 45 minutes in the oven.

Its really easy and only requires a few ingredients, which I'm sure all of you will find in your kitchen.

I've used ramekins here. If you dont have ramekins, fret not. You can double or triple the recipe and make it in a cake tin, casserole dish or whatever floats your boat. Just make sure that its oven proof, and you have something bigger to put it in. (see post below)
  
This recipe makes 2 servings. 
Prep time: 12-15 mins
Cooking time: 45 mins
Time in the Fridge: 2-3 hours

You'll need:
(For the Caramel)
1/4 cup of Sugar
2 tbsp of Water

(For the Custard)
1 cup of Full fat Milk
1 1/2 tsp Vanilla essence
3 tbsp Sugar
1 whole Egg
1 Egg yolk 


Preheat oven at 160 degree centigrade.
(For Caramel)

Heat sugar in a pot till light golden
Try not to stir with spoon as the sugar will crystallize. Use the spoon when the sugar is melted.
When light brown quickly add water and stir. (Measure water beforehand)
Be careful not to burn the sugar, once it reaches light brown color it will quickly turn dark brown and bitter.

Remove from heat and quickly pour into ramekins (or any dish you're using)
Careful not to burn yourself, as the sugar is REALLY REALLY HOT at this time.

Keep aside.
Meanwhile make the custard.

Gently heat Milk, vanilla essence and 2 tbsp of the sugar till hot but not boiling.

In a separate bowl, lightly whisk Egg, Egg yolk and the remaining 1 tbsp of sugar.

Now add the hot milk to the eggs in a thin stream while whisking continuously so that the eggs dont get cooked.

Pass the mixture through a sieve. This will insure that your creme caramels are silky smooth, so dont skip this step.

Now add this to the ramekins.  

Place the ramekins in a dish (I used a casserole dish) and fill the dish with water.
the water should be 3-4 cm high. 
This is called a Bain marie. The water will let the custard cook gently and not burn.

Cover the whole thing with aluminium and bake for 45 minutes.

Take out and leave to cool for about 30 minutes.

Now comes the hard part:
Cling wrap the ramekins, and keep in the fridge to chill for about 2-3 hours or overnight.

When ready to serve, gently run your knife on the edge of the custard (be careful not to break th custard, its so delicate. As you can see mine did break a little from the sides as i was taking it out). Place a platter on top, and flip. Remove the ramekin, and enjoy your master piece!

Leave a comment to tell me how it turns out!!
Enjoy!


Sunday, 30 August 2015

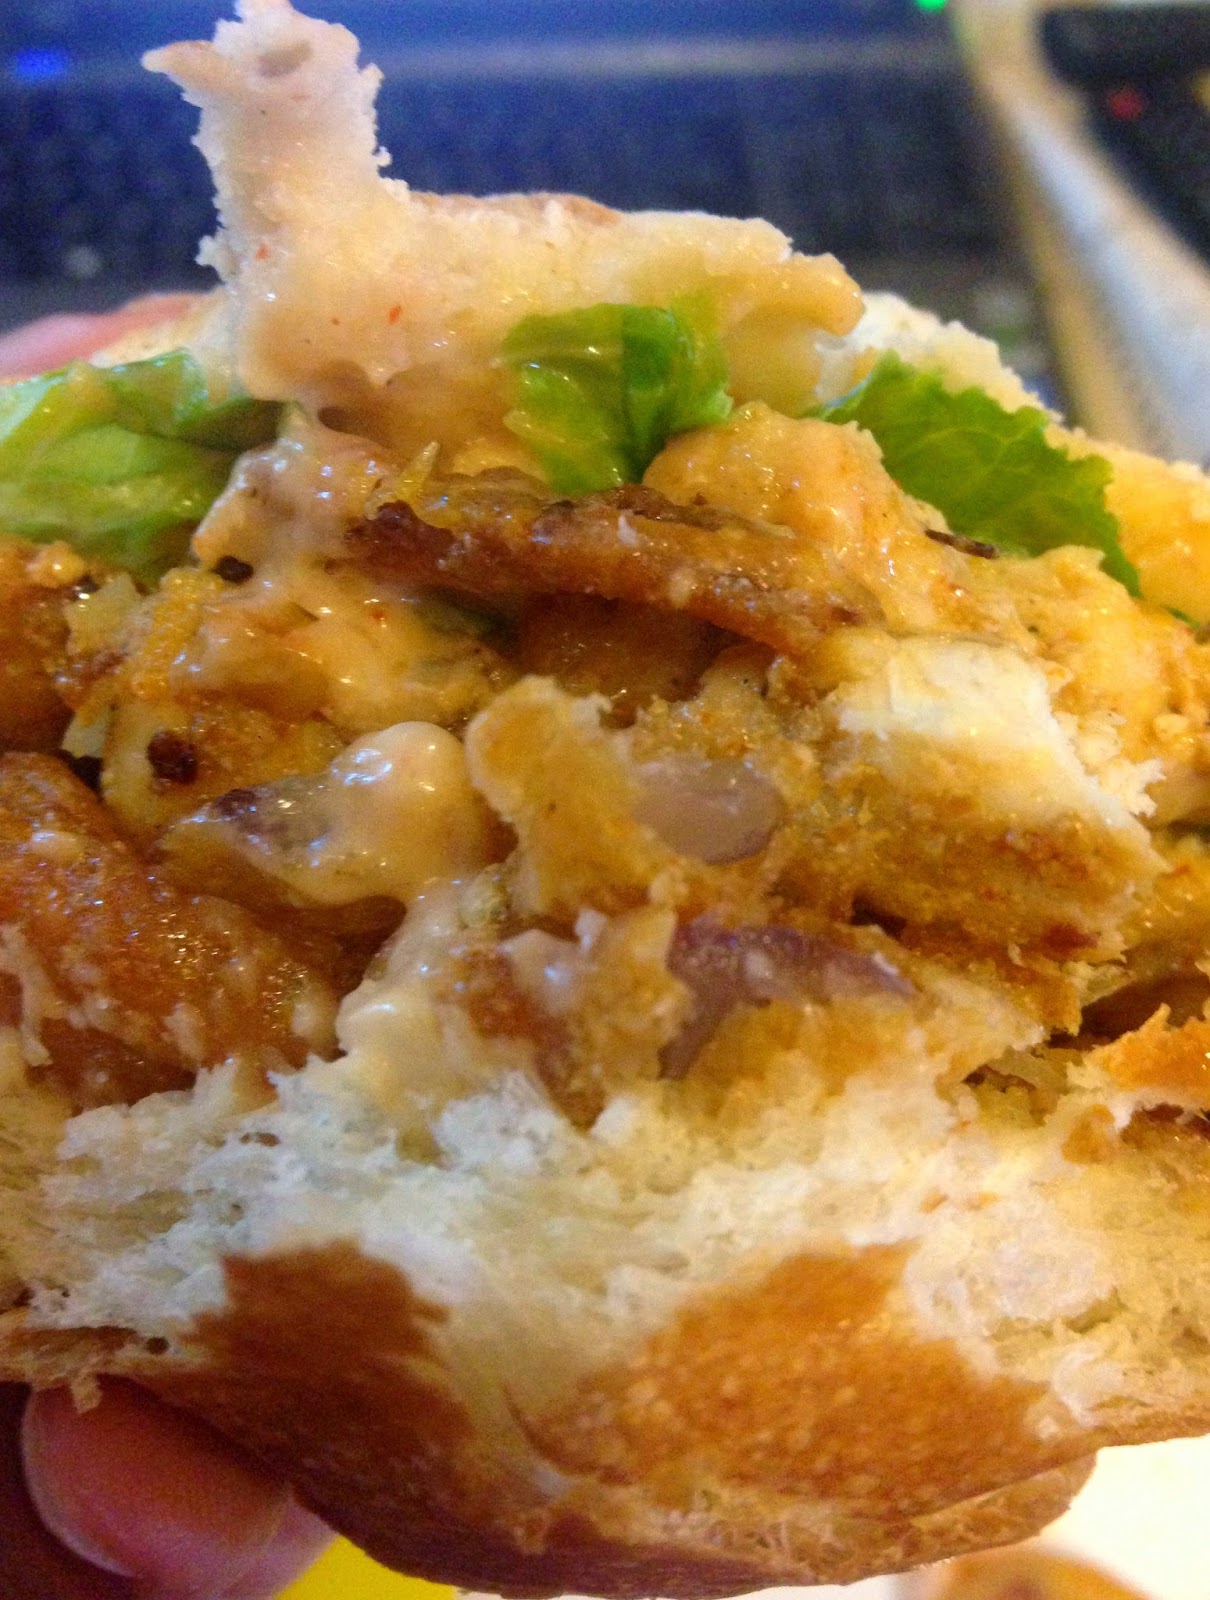
Cuban Chicken Sandwich


I saw this recipe on Food Network's Eat Street. It involves marinating the chicken with orange juice, i was instantly intrigued. I did change it just a little bit to suit my taste.

All the credit goes to the 'Bongo Brothers' food truck in NYC.

The sandwich is super juicy while the orange juice adds a tiny bit of tangy flavor to it. Really delicious!
I like to eat mine with Onion rings, but you can totally skip that if you dont like it. Serve with fries.

(This recipe serves 2. You can easily double or triple the recipe)

You'll need :
(For Chicken Marination)
1 chicken breast (or boneless chicken thighs) cut in cubes
Juice of 1 Orange (mandarins, sweet limes, or whatever floats your boat in the category)
Juice of 1 lemon
Salt to taste
1/2 tsp Red Chili Flakes
1/2 tsp of Black Pepper
1/4 tsp Oregano (dried or fresh, whichever you can find, I used dried)
1/4 tsp Cumin powder (Zeera powder)
1 tsp of Olive Oil (or any other oil)
1-2 cloves of roughly chopped Garlic

(For the Sauce)
3 tbsp Mayonnaise 
1 tbsp Cream
1 tsp White Vinegar
Salt to taste
pinch of Black Pepper
1 tsp Tomato ketchup
1 tbsp of finely chopped Onion

(For Onion Rings)
1 large Onion (cut into medium thickness rings)
4 tbsp All Purpose Flour (Maida)
4 Tbsp of Corn Flour
Salt to taste
Buttermilk (to make the batter)
NOTE: Make your own buttermilk by adding a tsp of vinegar to 1 cup of milk. Leave for 10-15 minutes. Than use as required.

(Other Ingredients)
Buns (store bought, homemade, your choice)
Lettuce

NOTE: This can also be made into a wrap, using flat bread or tortillas.


Add all the ingredients of the marinade in a bowl. Mix together.

Add chicken pieces. Mix to coat evenly than leave for 1 hour in the fridge.

Fry the chicken with all the juices till cooked through and the marinade becomes thick and saucey.

Like so.

(For The Sauce)

Add everything in a bowl

Mix together. Keep aside.

(For Onion Rings)

Mix flour, corn flour, salt and red chili powder in a bowl.

Add buttermilk to make a dropping consistency batter.

Dip Onion rings in the batter and deep fry

till golden brown.

(To Assemble)

Apply a generous amount of sauce to the bottom of the bun. 

Add lettuce, chicken, and onion rings.

How gorgeous is this?!

Hope you like it!

Enjoy!